Easy Crochet Cowl for Beginners | Free Cadie Cowl Crochet Pattern
Last updated on September 4th, 2025
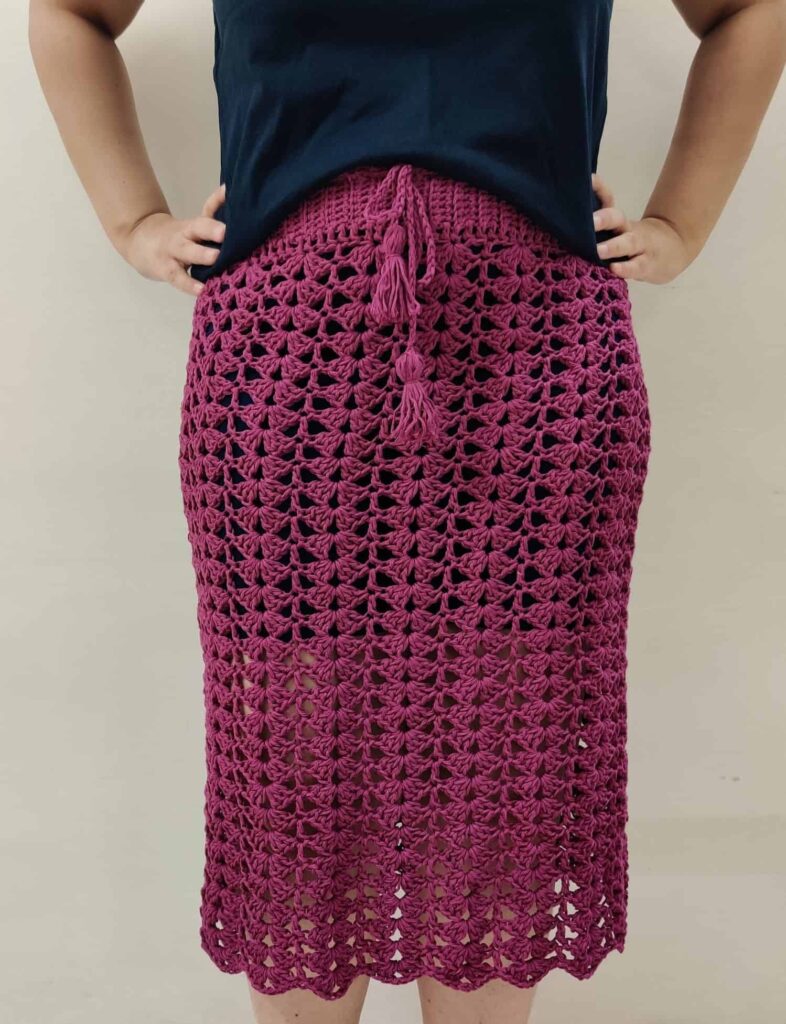
The Weekend Skirt has been inspired by the wait for it.. the Weekend!! All you need is 1 weekend to crochet this skirt. The pattern is an easy 1 row repeat, that can be done while watching tv or listening to music. It has no sewing. It has an option for shaping, if needed. The skirt does not have fixed sizes, adjustments are given to make it fit you!
So, let’s get started with this fun and simple skirt pattern. When you make this skirt, I would love to see it and share it on my instagram! Please tag me on instagram @letsallcrochetwithakita!

This post contains affiliate links, which means if you make a purchase from the links below, I will get a small percentage of the sales at no additional cost to you. Thank you for your continued support!
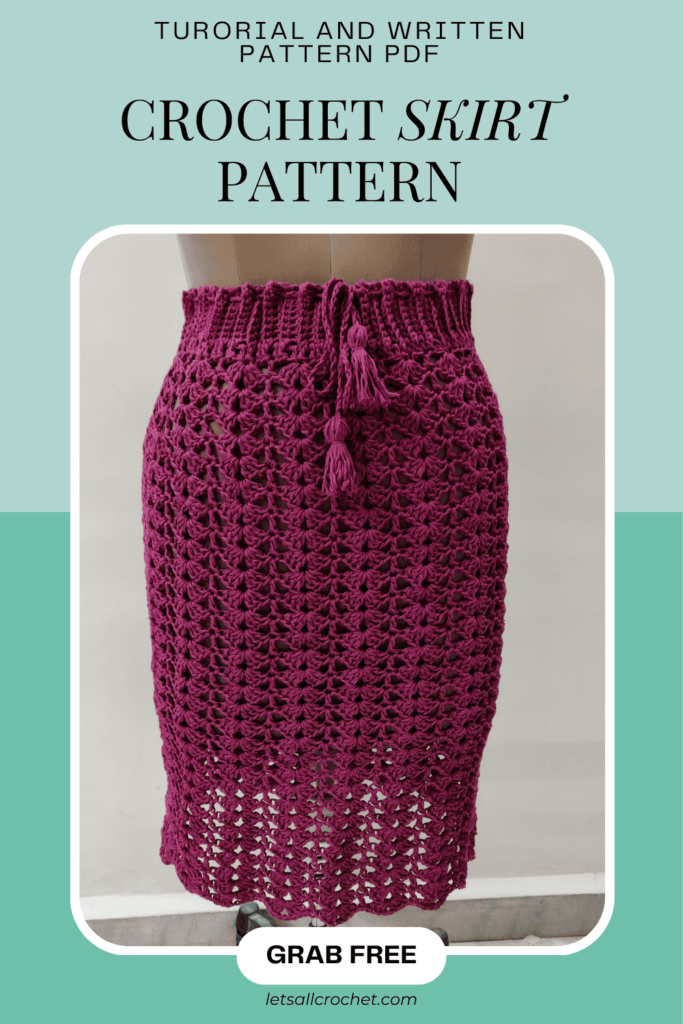
GRAB THE FREE
WEEKEND SKIRT PDF HERE!
Inspiration
I was rearranging my wardrobe and I saw an A line skirt and I was immediately inspired to crochet my own. To be honest, this is the first skirt I have crocheted and I could not be more happier. I started thinking I would make it a knee length skirt but I couldn’t stop crocheting it once I started and I ended up with a long-ish skirt (I don’t know the exact length but I absolutely love it!
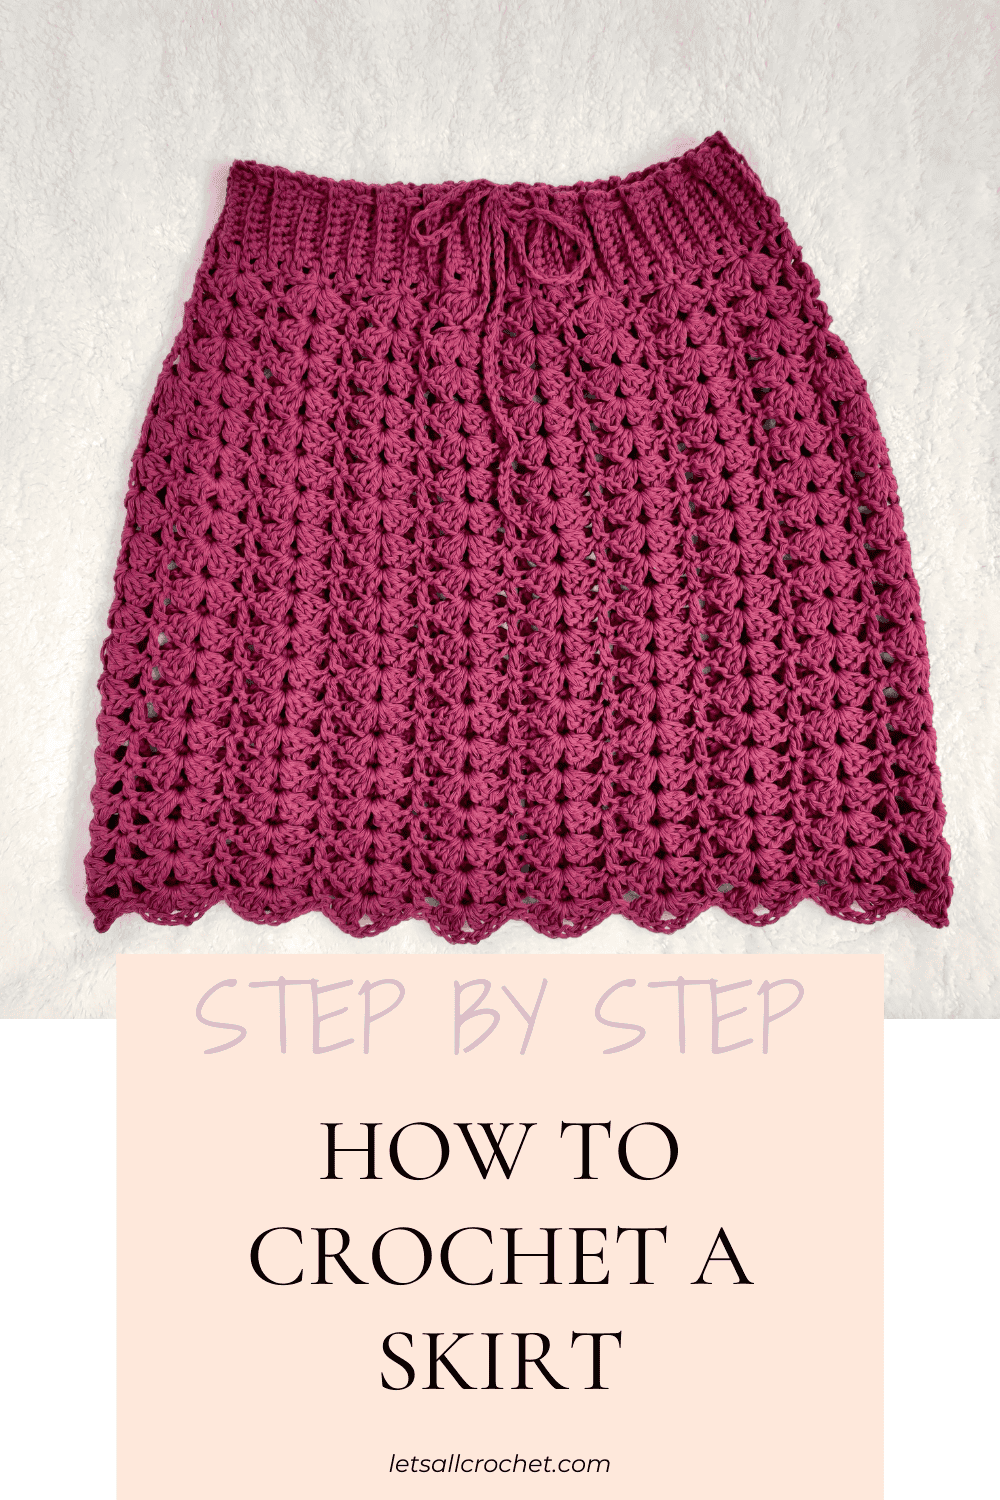
The shell pattern gives a peekaboo look that I adore. It looks very decent and at the same time it adds a little excitement! It can be worn as a beach wrap, an evening skirt, a weekend skirt, pretty much anything you want! Play around with the length or make a separate mini skirt, knee length skirt and full skirt, whatever you desire.
The customization options are endless.. besides the length, add more flare if you want. Add pompoms to the chain ties if you want. Or add tassels like me. Or you can just let it be chains. Whatever catches your fantasy! Make this in one color or multiple colors, just make the skirt yours!
Yarn
Sometimes the yarn inspires the pattern for me and sometimes the pattern inspires the yarn. In this case, the pattern came to me first. Then I went through my stash and I was looking for cotton yarns when I saw this burgundy color. And it was just saying “pick me pick me!”. So I decided to go with it, I had only 4 skeins and I used up 3 and a half making my skirt!
I have left the options for similar yarns below in the material section!
Construction
The construction of the skirt is super easy. The ribbing is made first in rows. It is joined to make a round. Then the skirt is worked in rounds. No sewing is needed. Add the ties with tassels last. Tassels are optional. There is an option for shaping as well.
3 WAYS TO GET THE PATTERN.
- Scroll below and read.
- Sign up for the LAC newsletter to get the pattern free for a limited time.
- Visit my stores below to purchase the pattern.
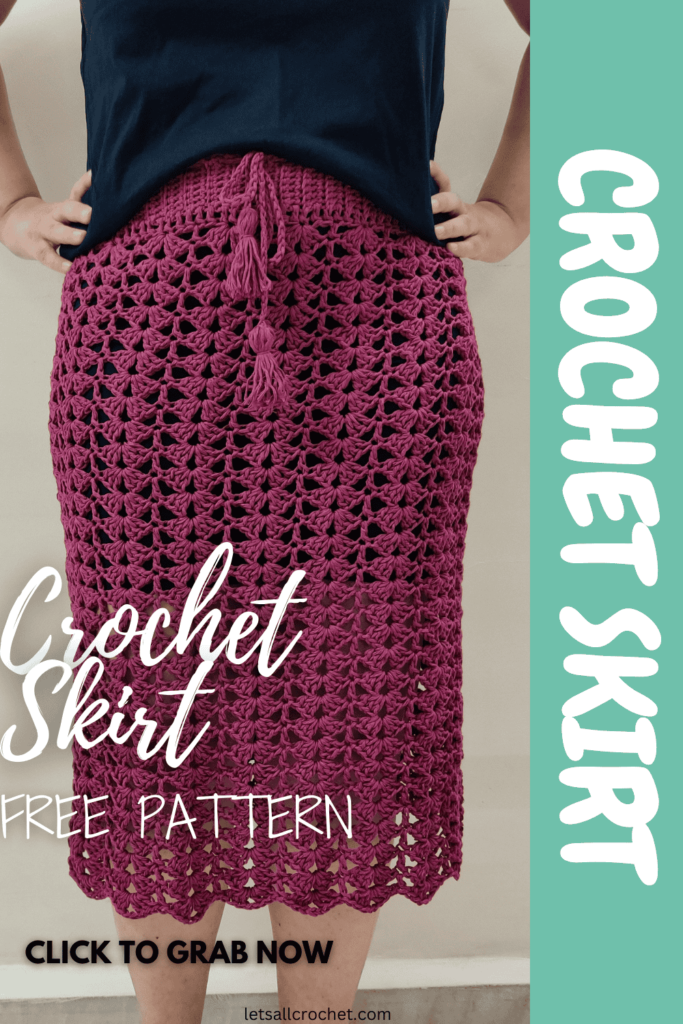
GRAB THE FREE
WEEKEND SKIRT PDF HERE!
You can purchase the AD FREE pattern. It is available in the form of a downloadable, low cost PDF (less than a coffee) in my shops. Click your favorite place to shop patterns. Print and crochet at your convenience. Give yourself this gift! You deserve this!!
Faqs about crochet skirts
Can you crochet a skirt?
Yes you can crochet a skirt and it is much easier than you think! Start by making a ribbed waistband/ chain to fit you. Connect edges to form a circle. Now, crochet in rounds, adding increases gradually if you want a flared look or keeping it even for a straight fit. Keep measuring against yourself as you go. Once it’s the right length, fasten off the yarn, weave in the ends, and voila! Your crocheted skirt is ready to wear.
What do you wear under a crocheted skirt?
Under a crocheted skirt, it’s best to wear a slip or lining for coverage and comfort, especially if the crochet pattern is open or lacy. Alternatively, you can wear a bathing suit/ leggings or fitted cycling shorts depending on your style preference and the occasion.
How long does it take to crochet a skirt?
I took a weekend, about 10- 11 hours. It is much faster than expected especially if it is a lacy skirt. The skirt does not require counting of rounds, just keep going till you like the length! The number of hours it takes to crochet a skirt can vary significantly based on the complexity of the design, the skill level of the crocheter, and the length of the skirt.
Which yarn is best for crochet skirt?
For crocheting a skirt, cotton or a cotton blend yarn is ideal. These yarns are durable, breathable, and hold their shape well, making them perfect for clothing. If you’re looking for something a bit more luxurious or warmer, consider a wool or bamboo blend. Always choose a yarn that feels comfortable against the skin and matches the drape and weight you desire for your skirt.
Skill level:
Advanced beginner.
Sizes:
Can be made in any size.
Sizing Notes:
You will need to check size as you crochet it.
Material
Yarn: Any medium weight or weight 4 cotton or cotton mix yarn can be used.
Suggested:
- Lily Sugar’n Cream
- Lion brand- 24/7 cotton yarn, pima cotton, made with love the cottony.
Yarn used by me: Loren Natural Cotton, Shade: R098.
Fiber: 85% cotton, 15% polyester; Yardage: 175 yards/ 160 m in 3.5 oz / 100 g.
Amount needed: I have used about 3.5 skeins of yarn/ 350 g/ 560 m/ 613 yards for my skirt. The amount will depend on the size you make.
Hook:
4.5 and 5 mm size crochet hook.
Notions:
Tapestry needle, scissors, measuring tape, stitch markers/ safety pin.
Gauge:
Not important since skirt will be made in custom size.
In ribbing: 9 st and 7 rows= 2” in ribbing.
In shell pattern: 2 shell repeats and 5 rows = 4” in body of skirt.
Abbreviations:
- ”= inches
- BLsc= back loop single crochet
- ch- 2 sp= chain 2 space
- ch= chain
- dc= double crochet
- fig= figure
- rep= repeat
- RS= right side, WS= wrong side
- sc= single crochet
- sk= skip stitch
- slst= slip stitch
- st= stitch
Notes
- The pattern is written using US terminology.
- The ribbing is made first in rows. It is joined to make a round. Then the skirt is worked in rounds. No sewing is needed. Add the ties with tassels last. Tassels are optional.
- Add more increases if needed.
- The pattern explains how to adjust size.
- Ch 3 counts as a dc. Ch 1 does not count as a st.
- The stitch count is mentioned at the end of each row in italics.
Special stitches
Shell: (3 dc, ch 2, 3 dc) in mentioned st.
Back loop single crochet: Insert your hook into back loop only, yarn over, pull up a loop, yarn over and pull through 2 loops.
GRAB THE FREE
WEEKEND SKIRT PDF HERE!
You can purchase the AD FREE pattern. It is available in the form of a downloadable, low cost PDF (less than a coffee) in my shops. Click your favorite place to shop patterns. Print and crochet at your convenience. Give yourself this gift! You deserve this!!
Pattern
Ribbing: With 4.5 mm hook.
Foundation ch: Ch 10.
Alteration note: Ch more for a wider ribbing.
Row 1 (RS): Sc in 2nd ch from hk, sc in each ch across. -9 sc
Row 2: Ch 1, turn, BLsc in 1st sc, ch 1, sk next sc, BLsc in each sc across. -8 sc
Row 3: Ch 1, turn, BLsc in 1st sc, BLsc in each st across. -9 sc
Note: BLsc in the ch 1 st also.
Rep row 2, 3 till the ribbing just fits around the widest part of your hips.
Join Ribbing:
Slst on WS
Place the sleeve with RS facing up. Fold in half- bring last row towards 1st row. Place the edges against each other correctly. Ch 1, slst across both edges. Do not fasten off. –9 slst
Turn inside out so RS faces up.
Sizing Tip: Slide the skirt ribbing on now. The ribbing should fit very snugly at the widest part of hips (stretch the ribbing out completely). If it is loose, subtract a few ribbing rows, if it is too tight, add a few ribbing rows.
Body of skirt: With 5 mm hook.
Sizing Tip: Use a 5.5 mm hook if you want a wider skirt.
Rnd 1 (RS): Ch 3, dc at side of each sc row around, slst to 3rd ch of ch 3. – any multiple of 12.
Note: At the end of the rnd, you must have a multiple of 12. Increase if needed. To increase, add 2 dc to the side of ribbing row, as many times as needed. Do not decrease, as we want to increase the width of the skirt body.
Rnd 2: Ch 3, *sk next 2 dc, shell in next dc, sk next 2 dc, dc in next dc; rep from * till last 5 dc, sk next 2 dc, shell in next dc, sk next 2 dc, slst to 3rd ch of ch 3.
Add St marker: Add a st marker on the dc opposite the ch 3. The ch 3 and the dc marked with st marker indicate the sides of the skirt. The number of shells between both sides should be same.
Rnd 3: Ch 5 (counts as dc and ch 2), dc in same st, *sk next 3 dc, shell in next ch- 2 sp, sk next 3 dc, dc in next dc**, rep from * to ** till dc with st marker, (ch 2, dc) in dc with st marker, add a st marker to ch- 2 sp, rep from * to ** till last dc, sk next 3 dc, shell in next ch- 2 sp, sk next 3 dc, slst to 3rd ch of ch 5.
Rnd 4: Ch 3, (2 dc, ch 2, 2 dc) in next ch- 2 sp, dc in next dc, *sk next 3 dc, shell in next ch- 2 sp, sk next 3 dc, dc in next dc**, rep from * to ** till dc before st marker, (2 dc, ch 2, 2 dc) in next ch- 2 sp, add a st marker to ch- 2 sp, dc in next dc, rep from * to ** till last dc, sk next 3 dc, shell in next ch- 2 sp, sk next 3 dc, slst to 3rd ch of ch 3.
Rnd 5: Ch 3, sk next 2 dc, shell in next ch- 2 sp, sk next 2 dc, dc in next dc, *sk next 3 dc, shell in next ch- 2 sp, sk next 3 dc, dc in next dc**, rep from * to ** till 2 dc before st marker, sk next 2 dc, shell in next ch- 2 sp, sk next 2 dc, dc in next dc, rep from * to ** till last dc, sk next 3 dc, shell in next ch- 2 sp, sk next 3 dc, slst to 3rd ch of ch 3.
Sizing Tip: Wear the skirt at this point and check fit. Rnd (3, 4 and 5) form 1 increase. Rep rnd 3 to 5 more times for increases if desired.
Rnd 6: Ch 3, *sk next 3 dc, shell in next ch- 2 sp, sk next 2 dc, dc in next dc**, rep from * to ** till last dc, sk next 3 dc, shell in next ch- 2 sp, sk next 3 dc, slst to 3rd ch of ch 3.
Rep rnd 6 for pattern as many times as needed till you have the desired length.
Make the skirt a mini skirt/ knee length/ long skirt/ whatever you desire.
Tassels
Refer to fig given below. Tutorial also linked at end of pattern.
Cut 2 strands of yarn, each 11” or 28 cm long.
Step 1: Wind the yarn around your 4 fingers/ a small book 20 times.
Step 2: Pull the wrapped yarn loops off. Cut the yarn.
Step 3: In one folded part insert one 11” strand cut above and knot it.
Step 4: Take the 2nd strand and wrap it 1 or 2 times around ½ to ¾ ”/ 1 cm from top of tassel and knot it.
Step 5: Cut open the other loop so strands are free.
Step 6: Trim them to the same size (about 3” from top). Tuck all extra strands in with a needle. Make one more in the same way.
Tie: with 4.5 mm hook.
Step 1: Ch: Make a Ch that is 10- 12” longer than the circumference of your waist. Fasten off leaving a 25” tail.
Step 2: Mark the centre of skirt, between the 2 sides where increases lie.
Step 3: Now take a needle and weave in the ch in the ch- 1 sps of ribbing. Wear the skirt and tie both ends. Check length of ties. Add or remove chs if needed.
Step 4: Then attach tassels to both ends of the ch once satisfied with length.
Congratulations! Your Weekend Skirt is now ready!
Timestamps have been marked below video, skip ahead to rows as needed.
Channel name on YouTube: Let’s All Crochet
Permissions/ copyright:
Copyright & Permissions
All content in this pattern, including instructions, photos, and design, is protected by copyright © Let’s All Crochet.
This pattern is for personal use only. It may not be copied, altered, translated, resold, taught in classes, or redistributed in any form (digital or physical).
You are welcome to sell finished items made from this pattern on a small scale, but please use your own photos when promoting your work. Credit to Let’s All Crochet as the pattern designer is appreciated.
If you’d like to share this pattern, you may share one photo and a direct link to the pattern on letsallcrochet.com. Please do not share or repost the instructions themselves.
This free crochet pattern is provided by Let’s All Crochet for personal use and complies with EU GPSR safety requirements. Read more here
Please tag me on instagram @letsallcrochetwithakita!
What’s next?
Join my newsletter and get a free pattern today! Join here- https://letsallcrochet.com/
Want to be a crochet designer? Check out the how to write a crochet pattern ebook here- https://letsallcrochet.com/write-freebie/
Check out my YouTube Channel for Designers Here: Crochet Designing With Akita
Thank you for reading my pattern right here on the blog, When you stay and read the pattern on here, I am compensated for my time and energy. This is a great free way to support me so I can keep designing more. If you want to share this pattern, please share this page/ link this page.
If you would like to save this for later, press CTRL + D to bookmark the page or click the heart/star on your mobile browser.
CLICK TO PIN ME FOR LATER!

Hi, I’m Aki! I love designing patterns and love teaching. I use lots of stitches and colors and try to simplify everything because all patterns become easy once simplified. I mostly create womens garments in all sizes. I hope you enjoy!
GRAB THE FREE
WEEKEND SKIRT PDF HERE!